
Yarn Christmas Trees
An affordable, DIY project for decorating your house this Christmas season.
Servings: 1 set of trees
Equipment
- Glue gun
Ingredients
- 3 foam cones (Dollar Tree or craft store)
- 1 skein green chenille yarn
- 3 10mm wooden beads
- 3 small wood slices ( I found a bag of these limb slices at Dollar Tree)
- 1 medium wood slice (See the amazon affiliate links above)
- 1 spool Gingham ribbon
- 1 pack glue gun sticks
Instructions
- Gather all supplies together in one place for easy access.

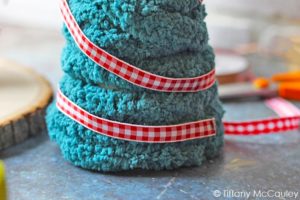
- Add a dab of hot glue to the bottom edge of your tree, press the end of your yarn into it and let it set. To avoid burning your fingers use a craft stick or skewer to hold it in place until it's ready. Wrap yarn around the tree, working your way up, be sure to cover it well so the white does not peek out, every so often add a dab of hot glue to hold it in place.

- Keep wrapping until you get to the very top, add a bit of glue to the top and curl your yarn around to completely cover the tip.

- To add a little color to your tree loosely wrap ⅛” ribbon around the tree, gluing in place every so often so that it drapes nice and natural.
- Squeeze hot glue on one end of your unfinished wooden bead and press into place on the top of the tree. You are now ready to place your trees, you want to be sure that the fit with a little space on your wood slice, Put your trees where you would like them and make a little mark in the center with a pencil, here you hot glue your small woodcut in place, I used just one to give my trees some varying height, you can skip them altogether or even stack two to make them even taller.
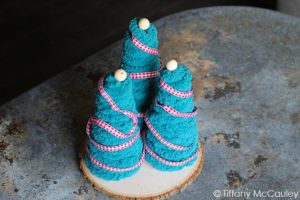
- Now hot glue the tree bottom to the small woodcut.

- If you are unable to find these small limb cuts you can use unfinished wooden blocks or something similar to build your tree trunk.
